DISCLAIMER The process for installing software to a Mac is different than a Windows machine.
The first thing you'll need is to download the Clio Mac App which can be found on our Resources page.
Once you have the .zip file, extract it to the desktop. You'll see Cliosoft S1 and S2. We'll need to move these, by copy and paste or click and drag, to the Applications folder inside of Finder.
After moving them to Applications, open up the one corresponding with the size of your sensor. For example, you would use Cliosoft S1 for a size 1 and S2 for a size 2.
Next, you'll need to locate the calibration file for your sensor. It is included on the USB drive that comes with every sensor. If you no longer have the USB drive, please contact SOTA Imaging technical support and we can provide you with the necessary files. You can reach us by phone at 714.532.6100 extension 2 or by email at support@sotaimaging.zendesk.com.
Once you have the sensor plugged in you will need to change the calibration file provided from a decimal serial number .RAW file to a hexadecimal .FFC file. To get the conversion, you can use a decimal converter website.
Example: 789126.RAW = C0A86.FFC
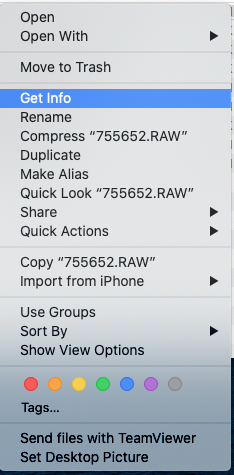
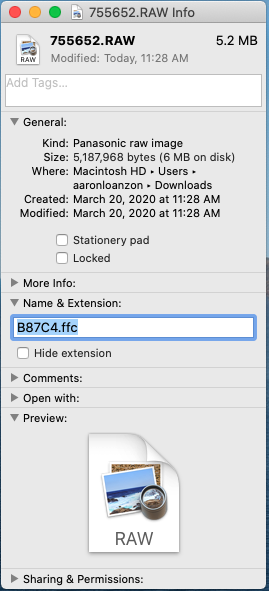
Next, right-click the .RAW file and click Get Info. You can then rename the file under 'Name & Extension', including the .FFC extension. You may need to uncheck the 'Hide extension' option if it isn't already.


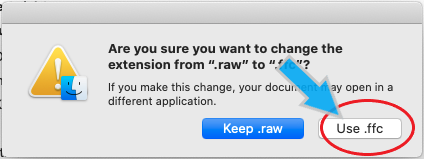
Once you close the information screen, a prompt will appear asking if you're sure you want to change the extension from .RAW to .FFC, be sure to select 'Use .FFC'.

Once that file is ready it will need to be moved to the Correction file folder inside Documents.
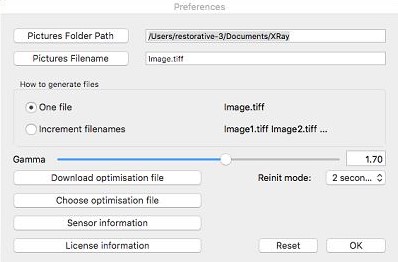
Open Cliosoft S2 and select 'Stop' then 'Setup'.
On the Preferences screen, you will need to select 'Choose optimisation file' then browse to the Correction file folder you moved the calibration files to previously.

Each sensor will correspond to its new .FFC file. After all the files are set we will need to set the up the XRay folder. Open up MacPractice. You will need admin rights inside of the software to edit the settings. Once the property tab is opened go to Digital Radiography. You will want to enable the X-ray folder location. Also, if this is in an initial install the preset and layouts will need to be installed for the Clio sensor. This only has to be done one time on any workstation. Last you will need to set both File Scan settings to .25.
The sensor is ready to test inside of MacPractice. Make sure either Clisoft S1 or S2 is running with MacPractice before exposing the sensor.
If you have any questions about any step of this process, we would love to assist you further. Again, you can reach us by phone at 714.532.6100 extension 2 or by email at support@sotaimaging.zendesk.com.
Comments
0 comments
Please sign in to leave a comment.